Mission accomplished. I put on the Encaustic layer, fused it, scraped it and polished it. I printed the "Secret Documents" to put in the "Secret Drawer at the bottom of the piece and hung the key on a nail.
I finished "Magic Chalkboard" at 2:30 the day of the Auction, took it there at 5, and it was sold at 8.
Now, back to work. I have several almost finished pieces on my Work Table that I should really go ahead and finish. Instead though, I decided to start on a series of small pieces that would sell in the $100 to $200 range. First, I considered 12” x 12”, which was the size of my early experiments with encaustics. However, I settled for 8”x8”, smaller than anything I had ever done, as a challenge. If you have read my blog, you know that I first design mocups of the pieces in Photoshop, using layers of textures and images from my ever increasing “collection”. That gives me a basic layout for the piece, though the final textures will be different. I print the images on an Archivel Epson Inkjet Printer on Archival Paper, cut them out precisely, collage them on my background with Archival Glue, add shadows and details with pastels and crayons, and finally cover the whole thing with clear Encaustic Medium(mostly Beeswax), which is melted with a heat gun, smoothed, scraped and polished.
I started mockups one by one, them discovered it was more fun and faster to work on triptychs. So I thought, why not do 9 at a time, in a neat 3 x 3 square. I created 9 different panels with different textures, colors, and geometry. I pulled a hundred or so images that attracted me from my collection, and started placing them wherever they seemed to in fit best. It worked well, and in a very natural way, just like I used to compose paintings out of my collection of actual objects. Things fall in place naturally, without even thinking. It is entirely instinctual at this stage.
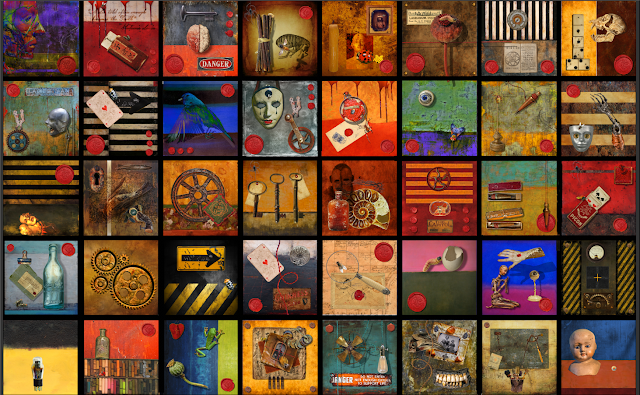
It was going so smoothly that I felt I needed more backgrounds, and I went to 12(3 x 4), then to 16(4 x 4), 24(4 x 6), and finally, why not, I ended up with 40(5 x 8). Thank God( and 8 cores, 32GB of RAM, and 5 x 1TeraBite SSD’s, which I had to install to keep building and rendering my huge 3D worlds) Photoshop managed to handle a 10500 x 16875 image with hundreds of layers, though it actually refused to save it because it was bigger than the 2GB limit, and I had to cut it in two to save it!
Here is a screenshot of it as it stands unfinished now.


No comments:
Post a Comment